
Step 1. Create your account
Click on the Sign Up button on the top right of the Tansy homepage (or from the dropdown menu on mobile).

Fill out the sign up form with your name, email, password, and timezone. Note: Your daily Tansy forecast is based on your selected time zone, so please be sure to correctly identify the time zone you will most often being using Tansy from. If you travel a lot, you will be able to update your current time zone in your Tansy account.
Once you create your account, you will be required to verify your email address associated with your account. Check your email inbox for an email with a link to confirm your email address. Once you've confirmed your email, you can proceed with the following steps.
Step 2. Start Subscription to Tansy
Tansy is a operated by a small team dedicated to helping folks be more informed when making financial decisions. We don't sell your data. Start a paid subscription to use Tansy and proceed to the next steps.
Step 3. Overview of the Dashboard
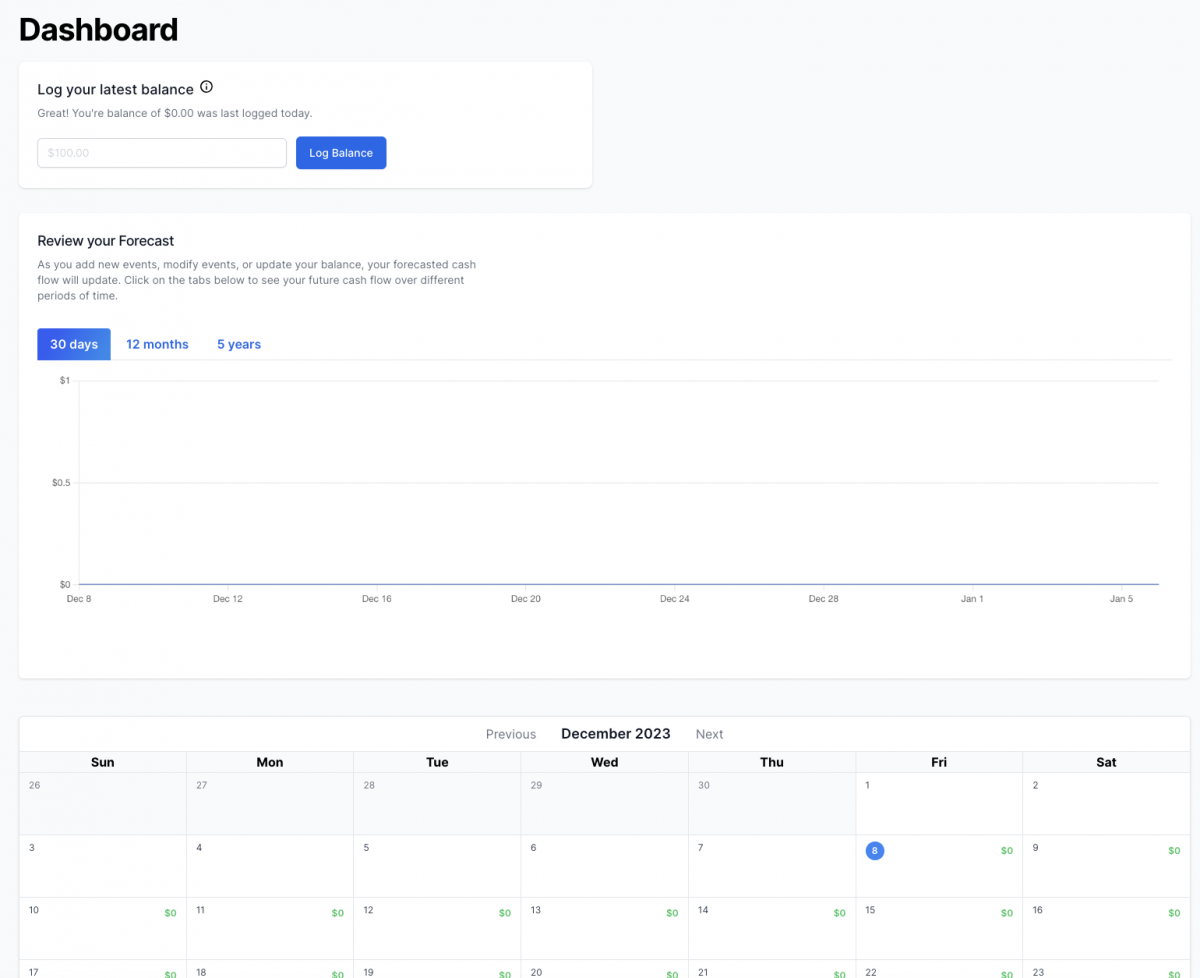
Once you’ve started your free trial, you’ll be re-directed back to the Tansy Dashboard. On the Dashboard, you can:
- Log your latest balance.
- Review your forecast in Chart View over the next 30 days, 12 months, or 5 years.
- Review your past and upcoming events and forecast in Calendar View.
Initially, your Dashboard will show your latest balance as $0 and your Chart and Calendar View will be empty, but in the next few steps, we’ll get live data on your Dashboard.
Step 4. Concept of Tansy daily cash flow forecast
Tansy provides a daily cash forecast of the money from your paycheck and use to pay expenses. There are two main parts that factor in to your forecast:
- How much money you have on-hand today to pay for expenses
- Upcoming recurring and one-time income and expenses
The Tansy forecast is based on the current amount of money you have on-hand today to pay for expenses. For many folks, this is their checking account balance, where they receive their paycheck and where they pay their expenses from.
If you tend to use a mix of a checking account and physical cash, you will calculate how much money you have on-hand today as your checking account balance plus the physical cash you would use for expenses. You don't include any money or investments that you have that you would otherwise not use to pay for rent, groceries, etc. Each time you log into Tansy, you will log how much money you have on-hand on that day (herein called your "balance").
The beauty of Tansy is that every time you log your balance, you've already accounted for all of the money you've already spent. So if you grabbed a coffee from the coffee shop on Monday, that's already accounted for in your balance and you don't need to track a transaction for that.
The second factor for your Tansy forecast is your "Events", which are your upcoming recurring and one-time income and expenses. This would include events like monthly rent/mortgage, weekly groceries, your paycheck, a one-time purchase of a new cell phone, etc.
With Tansy, you don't need to include every little expense though because when you update your balance each time you log-in, it already accounts for your past expenses. Try to include the major recurring expenses you have to start and as you get the hang of Tansy, you can choose to refine your expenses further if you need to.
Step 5. Log First Balance
To get started with generating your Tansy forecast, log your balance. That is the amount of liquid money you have available to pay for expenses. Remember don't include money or investments that you would not use to pay for your expenses.
Enter the amount on the Dashboard and click "Log Balance".
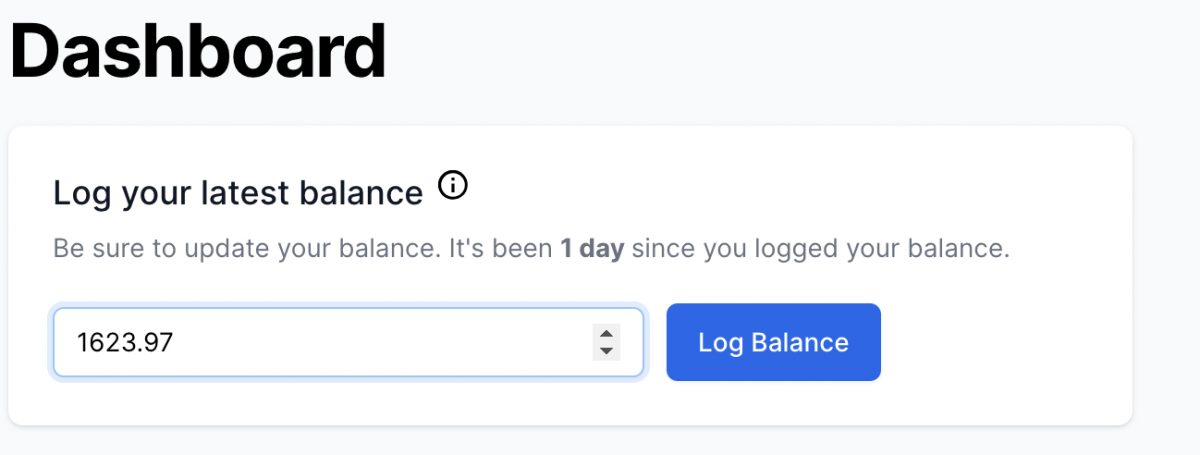
Once you've logged your balance, you should see the Chart and Calendar View on the Dashboard update. It's not all that interesting yet, because you haven't created any events. We'll do that next.
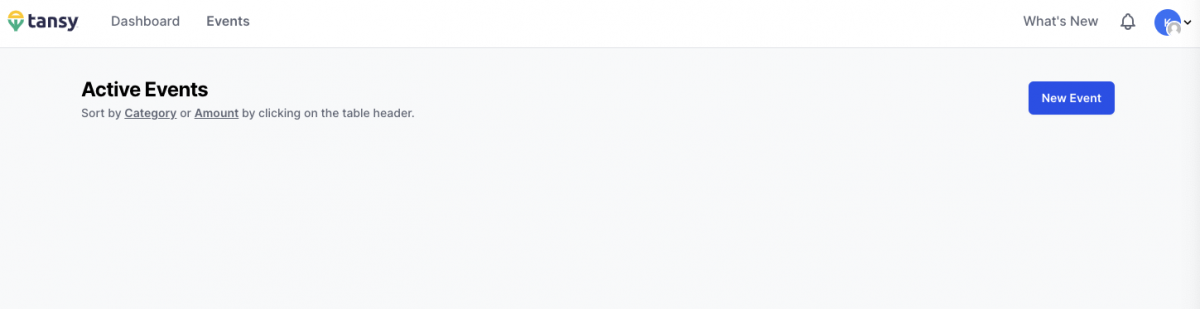
Step 6. Create First Event
We’ll start by creating our first event. Go to Events in top menu bar. Once you’re on the Events Page, click the “New Event” button.
An event is any upcoming recurring or one-time expense or income. This could be your biweekly paycheck, your monthly rent payment, your car insurance payment, weekly groceries, etc.
For Tansy to provide you the best daily cash flow forecast, defining major upcoming events is necessary. However, as you start working with Tansy you'll find the right balance of how much further you want to refine your events for your forecast.
For each event, you need to define the following:
- Category or name of income/expense (e.g. Paycheck, Rent)
- The amount of the income/expense
- Whether the event is an income or expense
- How often the event occurs (e.g. one-time, every # of days, every # of weeks, every # of months, every # of years)
- A start date
- An end date (this is optional if the event will continue to repeat)
To make it easier to create events, we provide you template events that you can select and customize as necessary. Click on the template events like "Generic Monthly Income" or "Weekly Groceries" at the top of the form and the form will automatically populate with starter information for that type of event.
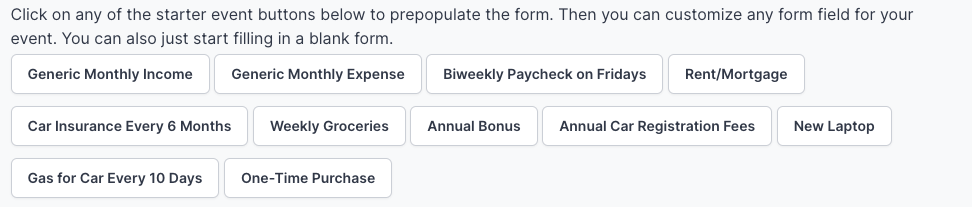
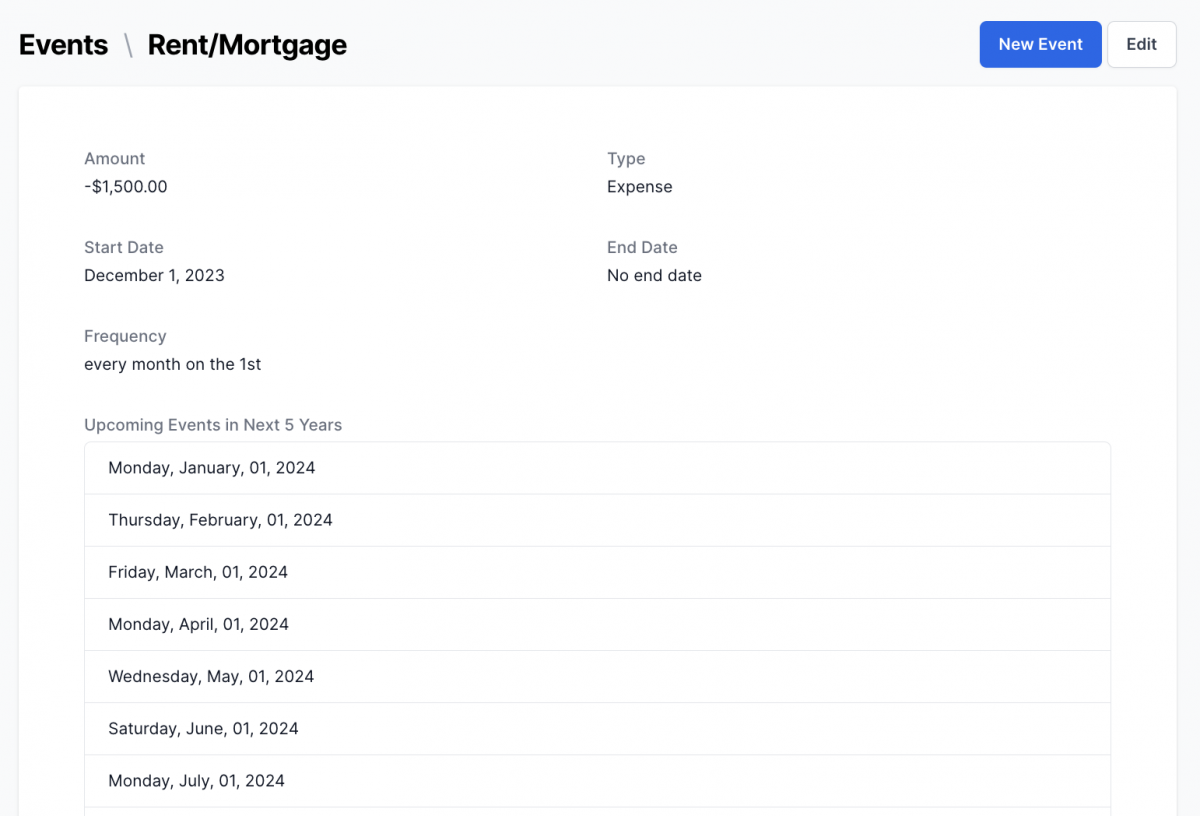
For example, if you click on the Rent/Mortgage template event, Tansy will populate the form with a monthly event starting on the first of the month.

Click the "Create Event" button to save your event. Once you've created your event, you're routed to the Events' page where you can see all of the details you just specified for the event and all of the upcoming dates that will be used in your Tansy forecast.
Step 7. Review forecast on dashboard
If you head back to your Dashboard, you can see that your Tansy forecast has been updated with your first event. You can view your forecast either in the Chart View or Calendar View.
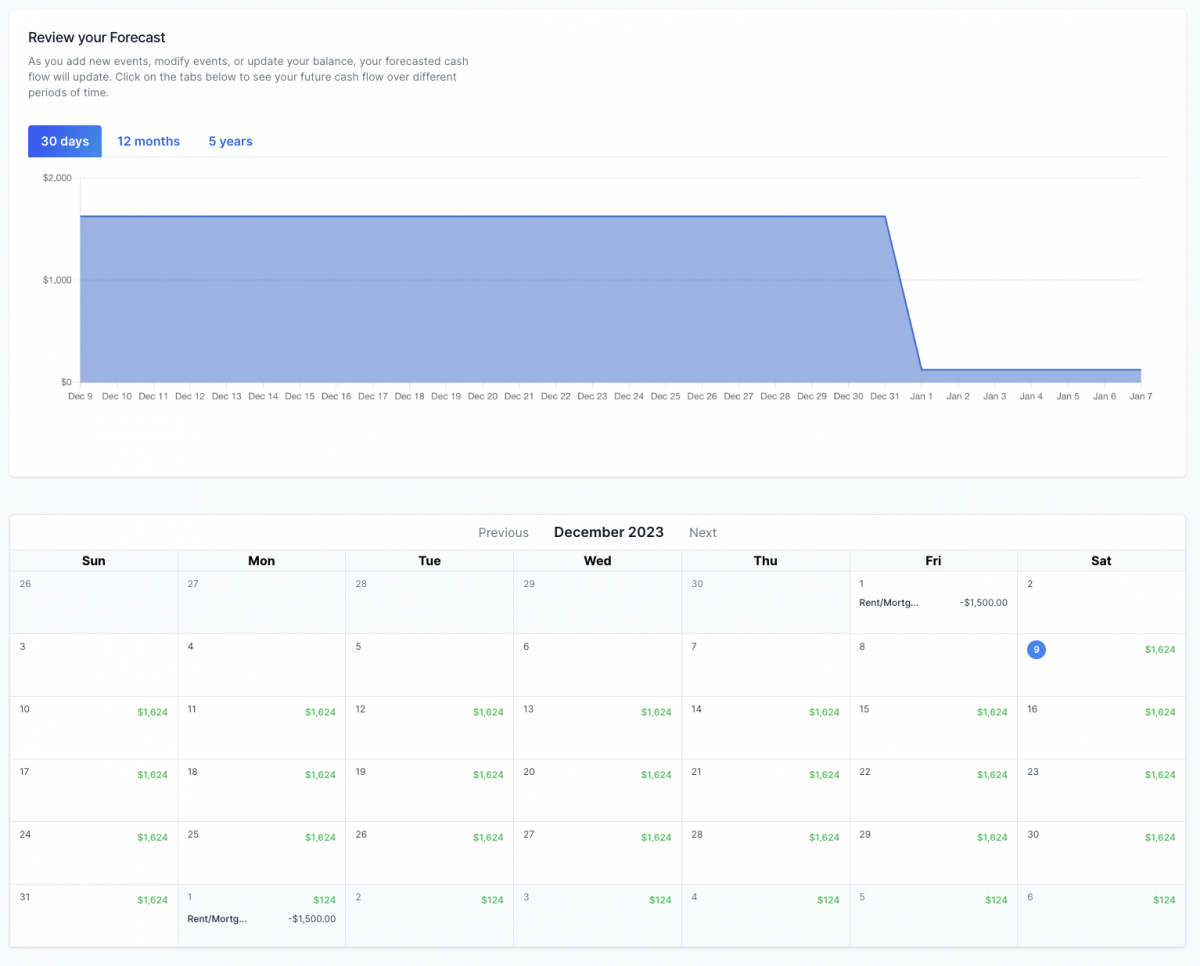
Try hovering over the chart to get a tooltip showing you the amount on any date or scroll down to the calendar to see each event over the upcoming weeks and months.
Step 8. Add rest of events
Now head back to the Events page and add the rest of your major income and expense events. If you need help or have questions on whether you should include an event, please feel free to reach out to our support team at [email protected].
When you have your events added, your Tansy forecast will be more accurate and you can use it to verify that you'll have enough cash on-hand to meet your upcoming expenses, test scenarios whether you can change jobs, add a new car payment, etc. The opportunities are endless and Tansy will help you make better financial decisions.
Keeping Tansy up to date
Research has shown that folks that pay more attention to their finances tend to be more likely to achieve their financial goals. To get the most value from Tansy, try to log in and log your balance at least 4 or 5 times a week. Quickly review your forecast and make sure you're still on track to be able to cover your expenses. If things are off-track, take a look at your upcoming events to see if there are any you can eliminate/skip or move.
If you have a new income or expense, just create a new event and re-check your forecast.
If you're enjoying Tansy and find it valuable for making better financial decisions, please let us and your friends know. We want to help more people feel more confident with their day-to-day finances and love to hear your success stories!
Send your feedback and questions to [email protected]!